Ribbet
Forum Replies Created
-
AuthorPosts
-
Hi Aaron,
Thanks for contacting us. This is a known issue affecting Google Chrome. By opening Ribbet in a different web browser, such as Firefox, Internet Explorer or Safari, you can then resize the text as large as you like. We do intend to overcome this issue in a future Ribbet version.
Let us know if you have any further questions!
Hi Susan,
Thanks for contacting us.
While there is often a DPI stored in an image’s EXIF data, images themselves don’t have a DPI (you can learn more here).
DPI refers to how many dots there are per inch when printed, and the smaller you print an image, the higher the DPI will be. So, for example, a 3000×3000 pixel image will have a DPI of 300 when printed at 10×10 inches. When printed at 5×5 inches, the same image will have a DPI of 600.
So, basically the only way to increase an image’s DPI is to increase its size. Normally however doing so will decrease the quality of the image, and so there isn’t any benefit of just resizing the image larger.
Let us know if you have any further questions.
Hi Chesleigh,
Thanks for contacting us.
Yes, you can achieve this by applying the Christmas Lights frame, and then clicking on the lights. Next click ‘Delete‘ on the Frame Properties dialog that appears (or hit the Delete key on your keyboard).
Let us know if you have any other questions!
Hi Laurie,
Images themselves don’t have a DPI. There is a DPI stored in the image’s EXIF data, however this is meaningless (you can learn more here).
DPI refers to how many dots there are per inch when printed, and the smaller you print an image, the higher the DPI will be. So, a 1650×2550 image will have a DPI of 300 when printed at 5.5×8.5 inches. When printed at 2.75×4.25 inches, the same image will have a DPI of 600.
I hope this is clear. Please let us know if you have any further questions!
Hi Laurie,
Thanks for contacting us!
If you create a Blank Canvas at 1650×2550 this will be the book cover at 300DPI. You can then drag on your image from the Photo Basket (at the bottom of the editor) and resize it smaller. As long as you don’t resize it larger than its original size, you will maintain a high quality, and the resulting image will be 300DPI for the book cover (including the blank space around your image).
Let us know if you have any further questions.
Hi Agnes,
Thanks for contacting us!
Yes, you can achieve this by first creating a ‘Blank Canvas‘ with a white background (from the Library > Start tab). You can then add text from the Text tab and select black as the text’s color.
Let us know if you have any problems with this or any other questions.
Hi Sagitta,
Sorry to hear that you’ve run into this issue! I can see that you’re running Firefox under Linux. Although our support for Linux is limited, I would suggest uninstalling and reinstalling Flash. Also check that you’re running the latest version of Firefox.
Let us know if we can be of any further assistance! If you need further help on this issue please contact us here so that we can help you out one-on-one.
Hi, Thanks for contacting us!
In order to use a custom sticker, simply upload the sticker to the Photo Basket at the bottom of the editor. You can then drag it on, resize it, and use it as a sticker.
In order to maintain transparency in your logo, first create it in Ribbet using a Blank Canvas with the transparent background option ticked, and then save it in PNG format (from the format dropdown on the Save tab). Then, when uploaded to the Photo Basket and dragged on, your logo will maintain its transparency (and won’t have a white background).
Let us know if you have any further questions!
Hi Matt,
As long as you open from the Library > History tab, you should be in the same place as you were just before you saved (able to move elements etc). If wishing to edit the photos within a collage however, it’s necessary to Undo back until you’re in ‘Collage Mode‘ (when the Collage tab appears up the top center).
Let us know if you have any further questions!
Hi AJHPants,
Thanks for contacting us! The only way to currently achieve this is by using one of the Frames to create the shape. For example:
– To create a round shape, use the Rounded Edges frame with the Corner Radius setting at 100%
– To create a heart shape, use the Heart frame with a Polish setting of 0 and background of whiteLet us know if we can be of any further assistance!
Hi Felicia,
To add a watermark:
1) Open up your main image
2) Upload the watermark to the Photo Basket at the bottom of the editor: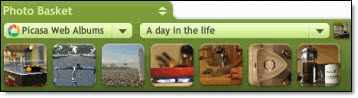
3) Drag the watermark onto your image
4) You can then adjust the ‘Advanced Blend Mode’ and ‘Fade’ which will appear on the Photo Properties dialog when clicking your watermarkLet us know if you have any further questions!
Hi Gajan,
Thanks for contacting us! In answer to your questions:
1. Your credit card payment will be completely secure. Our payment provider is Braintree. Owned by PayPal, and used by such well renowned companies as AirBNB and Uber, you can feel confident that your information will be safe.
We also offer the ability to upgrade using PayPal. This way you don’t actually have to share your credit card details with us, and simply upgrade using your PayPal account.
2. The cost for 1 year is US $29.95. Your credit card will actually do the conversion to CAD, however you can use this tool to see the current exchange rate, which will give an excellent indication of what the charge will be.
Let us know if you have any other questions.
-
AuthorPosts
