
Welcome to the 2nd ever installation of Ribbet Tips and Tricks! This time we’ll be focusing on some of the most useful features of of our new interface:
– Light and Dark Themes:
You can switch between light and dark themes by clicking the 2 circles up the top right of our new editor. The difference is like night and day and the darker theme works better when there isn’t much natural light on your monitor.
– Large and Small Effect Previews
You can also choose between large and small effect previews on the left panel, by clicking the toggle at the top right of the list. Large previews give you a better idea of what each effect will look like without actually trying it, whereas the smaller previews let you see more of the list at once making it quicker to navigate if you know what you want:

– Reset a Slider
You can now set sliders back to their original position by double-clicking their circle:

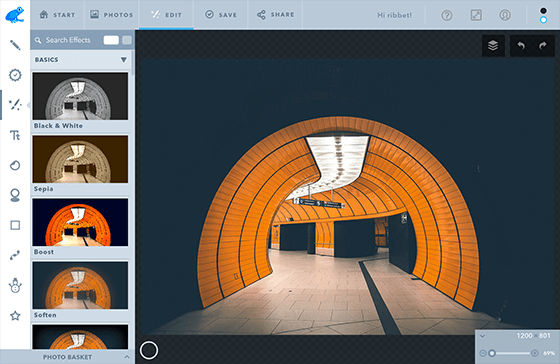
– Background Grids
You can now switch between 5 different background grids while you’re working on an image, providing an enhanced workspace with improved visibility and contrast. You’ll find the selector down the bottom left next to the photo basket:

– Sharing your Work
You can now share a Ribbet URL in order to share your edit. This means you don’t always have to download and then re-upload your work in say an email attachment. To use this feature simply head to the SHARE tab (on the top toolbar to the right of SAVE) and copy the URL displayed.
– Our Old Editor
You can still access the old Ribbet editor by clicking the link above the blue START EDITING button on our homepage, or directly at www.ribbet.com/cls
– We’d Love your Feedback!
If you have any feedback on our new editor, our iOS apps, or anything else, please leave us a comment below.
For those who missed it, here’s our Tips and Tricks #1


10 Comments
How do I create a short cut to Ribbet?
Hi Nancy!
Ribbet’s online editor is basically just a webpage, so you can create a favorite as you would for any other webpage. I believe that you’re using Chrome browser on Windows – here’s an article outlining how to add a favorite to Chrome, your desktop or Start bar.
Regards – The Ribbet Team
Can I insert an image I have on my computer onto a image I’m working on in ribbet?
Hi Savannah,
Thanks for reaching out to us! You can insert additional images by uploading them to the Photo Basket (at the bottom of the editor) and then dragging them onto your main photo.
Let us know if you have any other questions!
Regards – The Ribbet Team
How can I add a watermark in this new program?
Thank you.
Hi Kelly,
Thanks for reaching out to us! You can add a watermark image by uploading a photo to the Photo Basket (at the bottom of the editor) and dragging it onto your image. You can also add a text watermark by using the Text tab (on the left bar when editing).
Let us know if you have any other questions!
Regards – The Ribbet Team
Deseo entrar a mi cuenta desde mi cel
Hi Madelaine, Thanks for reaching out to us! We’ve been working like crazy on our Android app for phones and tablets, and it will be available in beta soon, and then live shortly after that on the Google Play store. We had to create Ribbet again from scratch for Android and it’s a huge job! The initial version will have all the basic edits, touch-ups, frames and effects, and we will be adding Pro tools and more effects, touch-ups and stickers in updates after the initial release.
Let us know if you have any other questions 🙂
Regards – The Ribbet Team
How do you delete items in a picture???
Hi MaryJean,
Thanks for reaching out to us!
There are a few ways to achieve this:
1. To paint a flat color (such as black or white) over an item in your picture, use the Effects tab > Sketch tool to paint over the item.
2. To create a transparent background, start with a Blank Canvas (from the Start tab) and tick the Transparent background checkbox. Drag your photo on from the Photo Basket (at the very bottom of the editor) and use the Erase icon on the Photo Properties dialog that appears, to delete from your photo.
3. You can use the Pro tab > Clone tool to copy a nearby area of your photo over the object you want to delete. First click on the area you want to copy from, then paint over the area you want to copy over. If there was for example a towel on the sand you wanted to delete, you could clone some nearby sand over the towel so that it effectively disappears.
If you have any questions about these, please let me know.